
If you're all out of prank ideas for April Fool's Day, we've got a few that your Apple-loving friends will enjoy (or hate?). You can have a little bit of fun if you don't have access to their iOS device or Mac, but for the best pranks, you will need access to their devices, even if it's just for a few seconds.
Out of all the many pranks available for iPad, iPhone, iPod touch, and macOS, here are our four favorites. (Mainly because they don't require a whole lot of time, which isn't always possible when you have someone else's device in your hands.)
1. Don't Hold Your Breath for That Next Message
You're engaged in an intense conversation and expect a witty reply any second. You stare at your iPhone, waiting for the message, but nothing. Moments pass... still nothing. Then, the "typing" dots come up and you can't wait to see what appears after! They disappear. They come back up, then vanish again. Minutes go by like this, and there's still no actual response!
This is a scenario that happens all too often, and is extremely frustrating if you're staring at your screen in anticipation. But it can be even worse...
Just save this GIF file on your iPhone, iPad, or Mac, then send it to your recipient (who also has a iPhone, iPad, or Mac) as an iMessage in the Messages app. It replicates the typing indicator and will continue churning along, and they'll think you're writing the longest message in history.
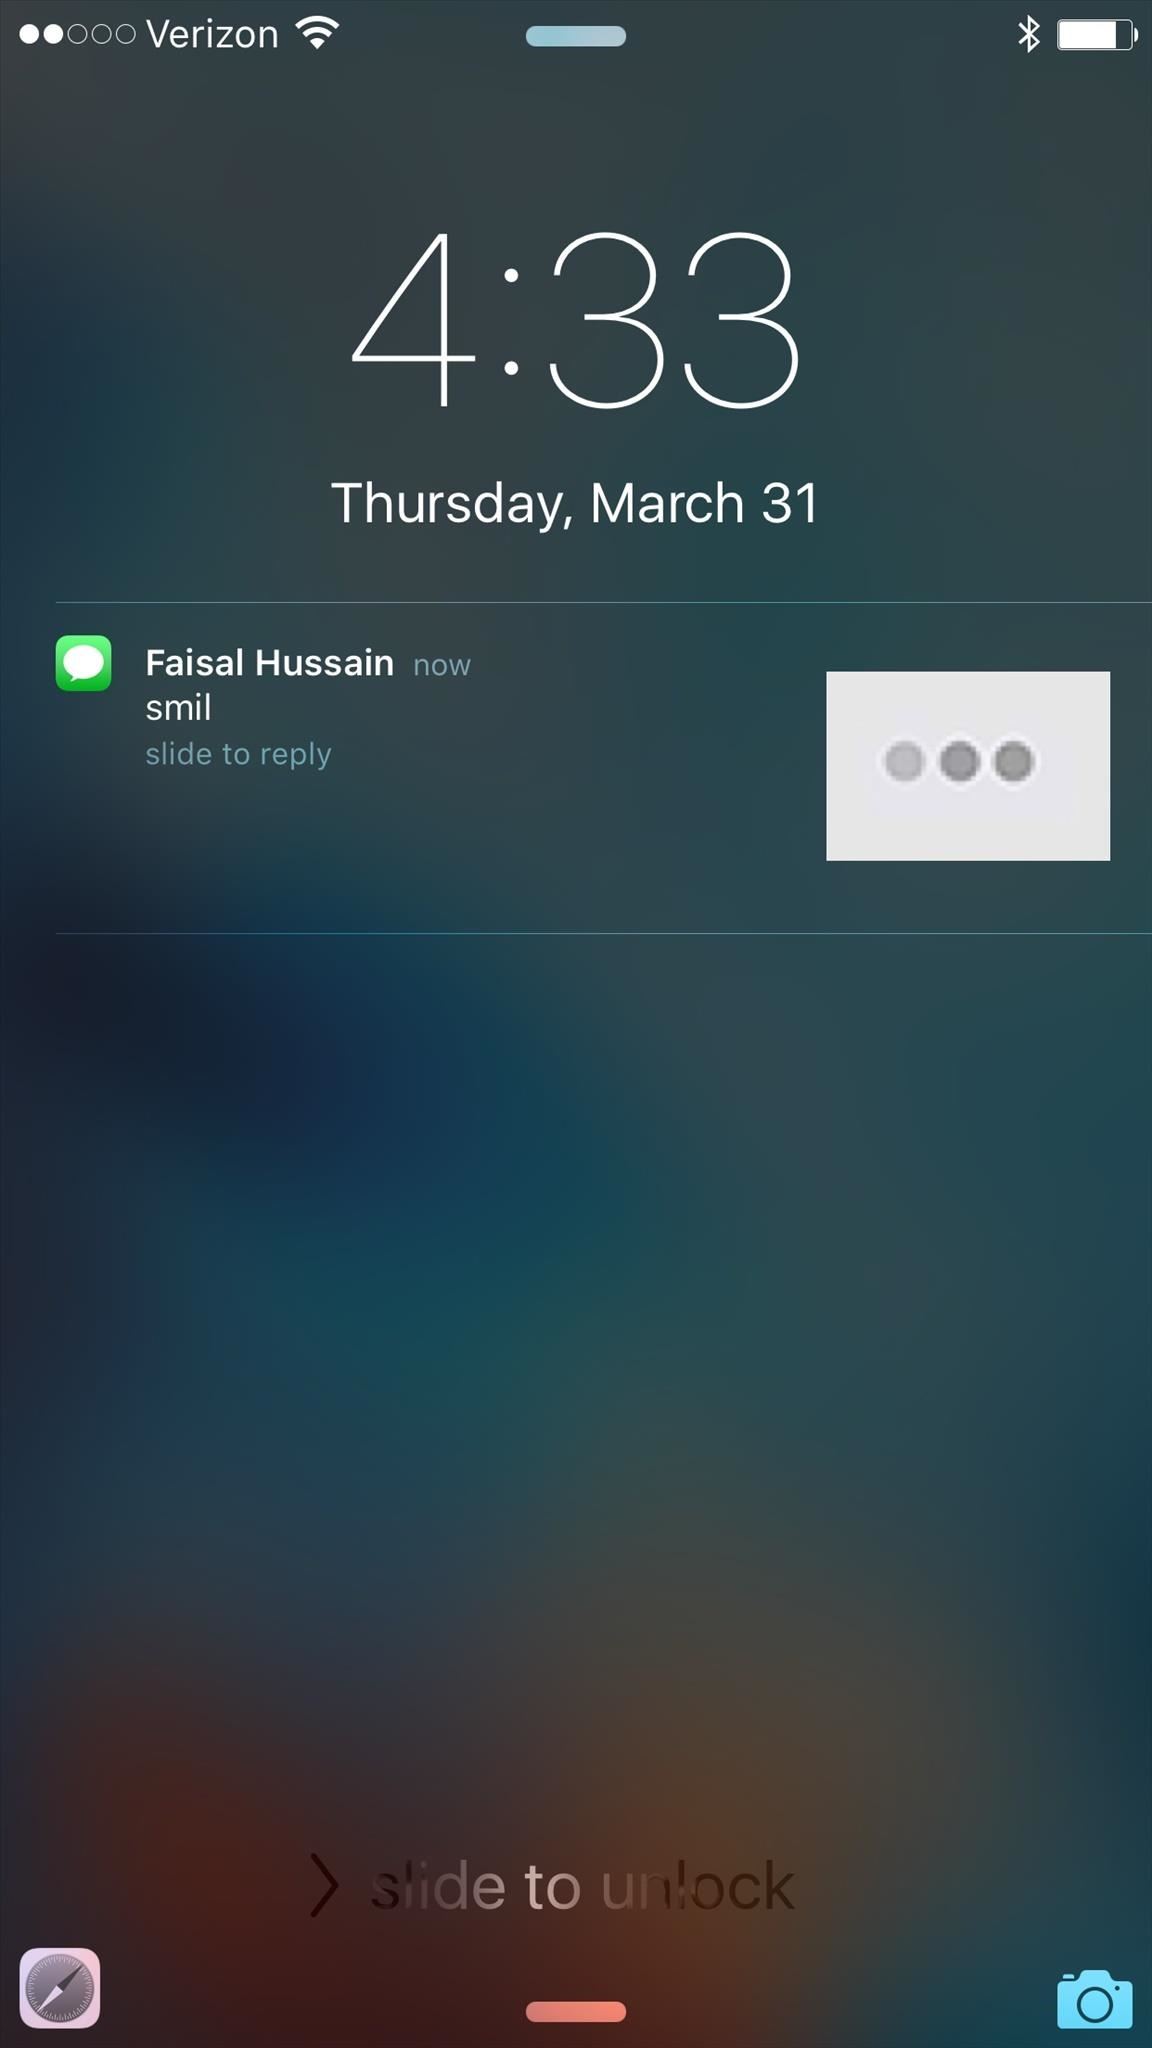
The only way they'll know what happened is if they message you back and your "typing" gets moved up in the conversation. And if they're not actually looking at the Messages app, they'll probably get a notification with a preview of the image, so your prank will be blown before it even starts.
2. Guided Access, aka My iPhone Is Broken
Guided Access was introduced with iOS 6 back in 2012, and allowed you to lock your iOS device so that only one app could be used. While this feature can be used for beneficial purposes, that's not what we're concerned with here.
This one is a little tricky, only because you'll need access to your victim's iPad, iPhone, or iPod touch. If you manage to bypass the lock screen (if any), go to Settings -> General -> Accessibility -> Guided Access (or search for "Guided Access" inside Settings) and toggle it on.
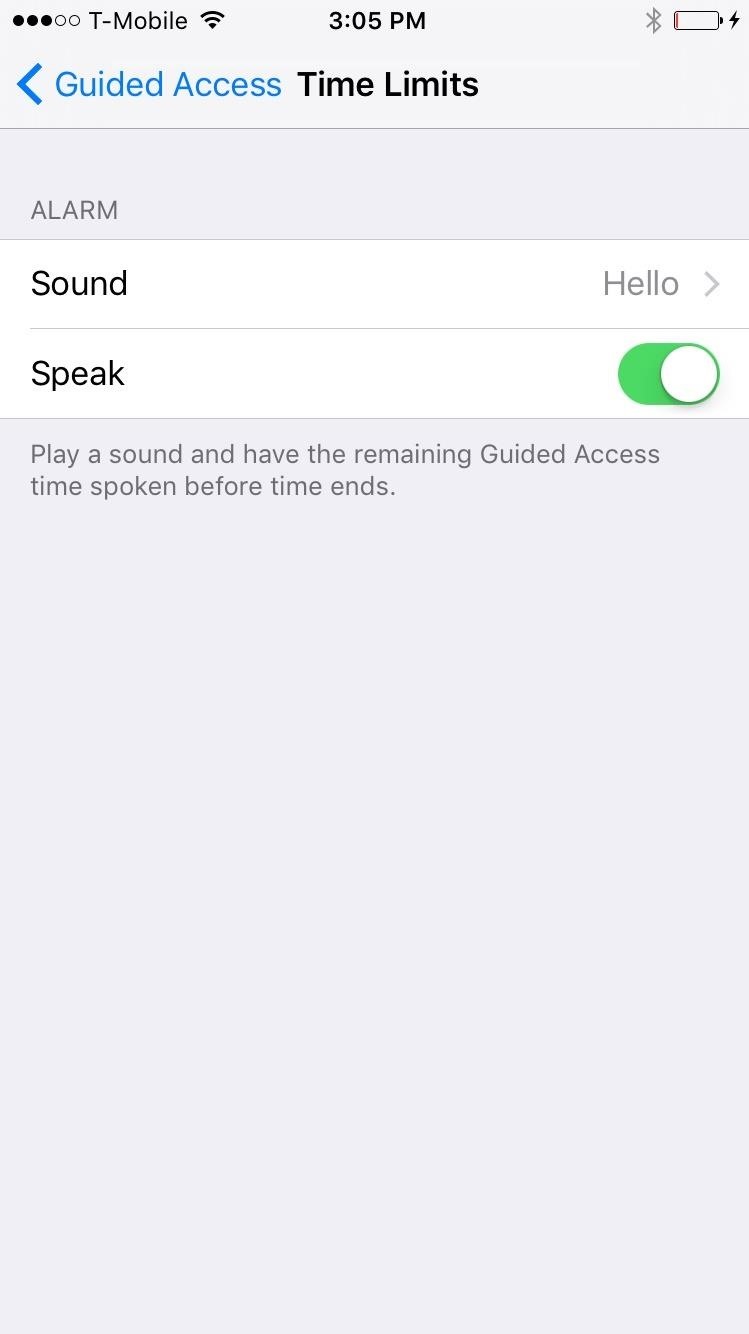
For even more mayhem, you can add a password via Passcode Settings, or play a sound via the Time Limits option, but it's not necessary if you don't have the time.
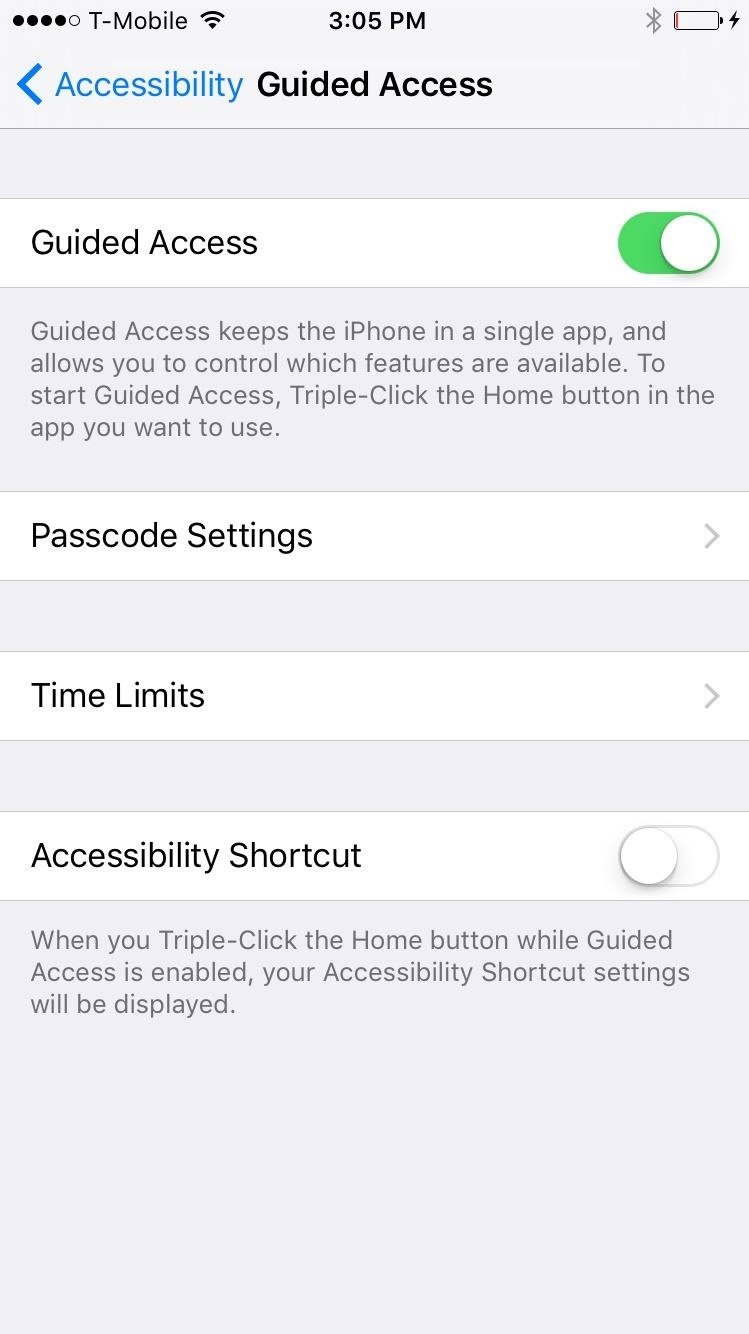
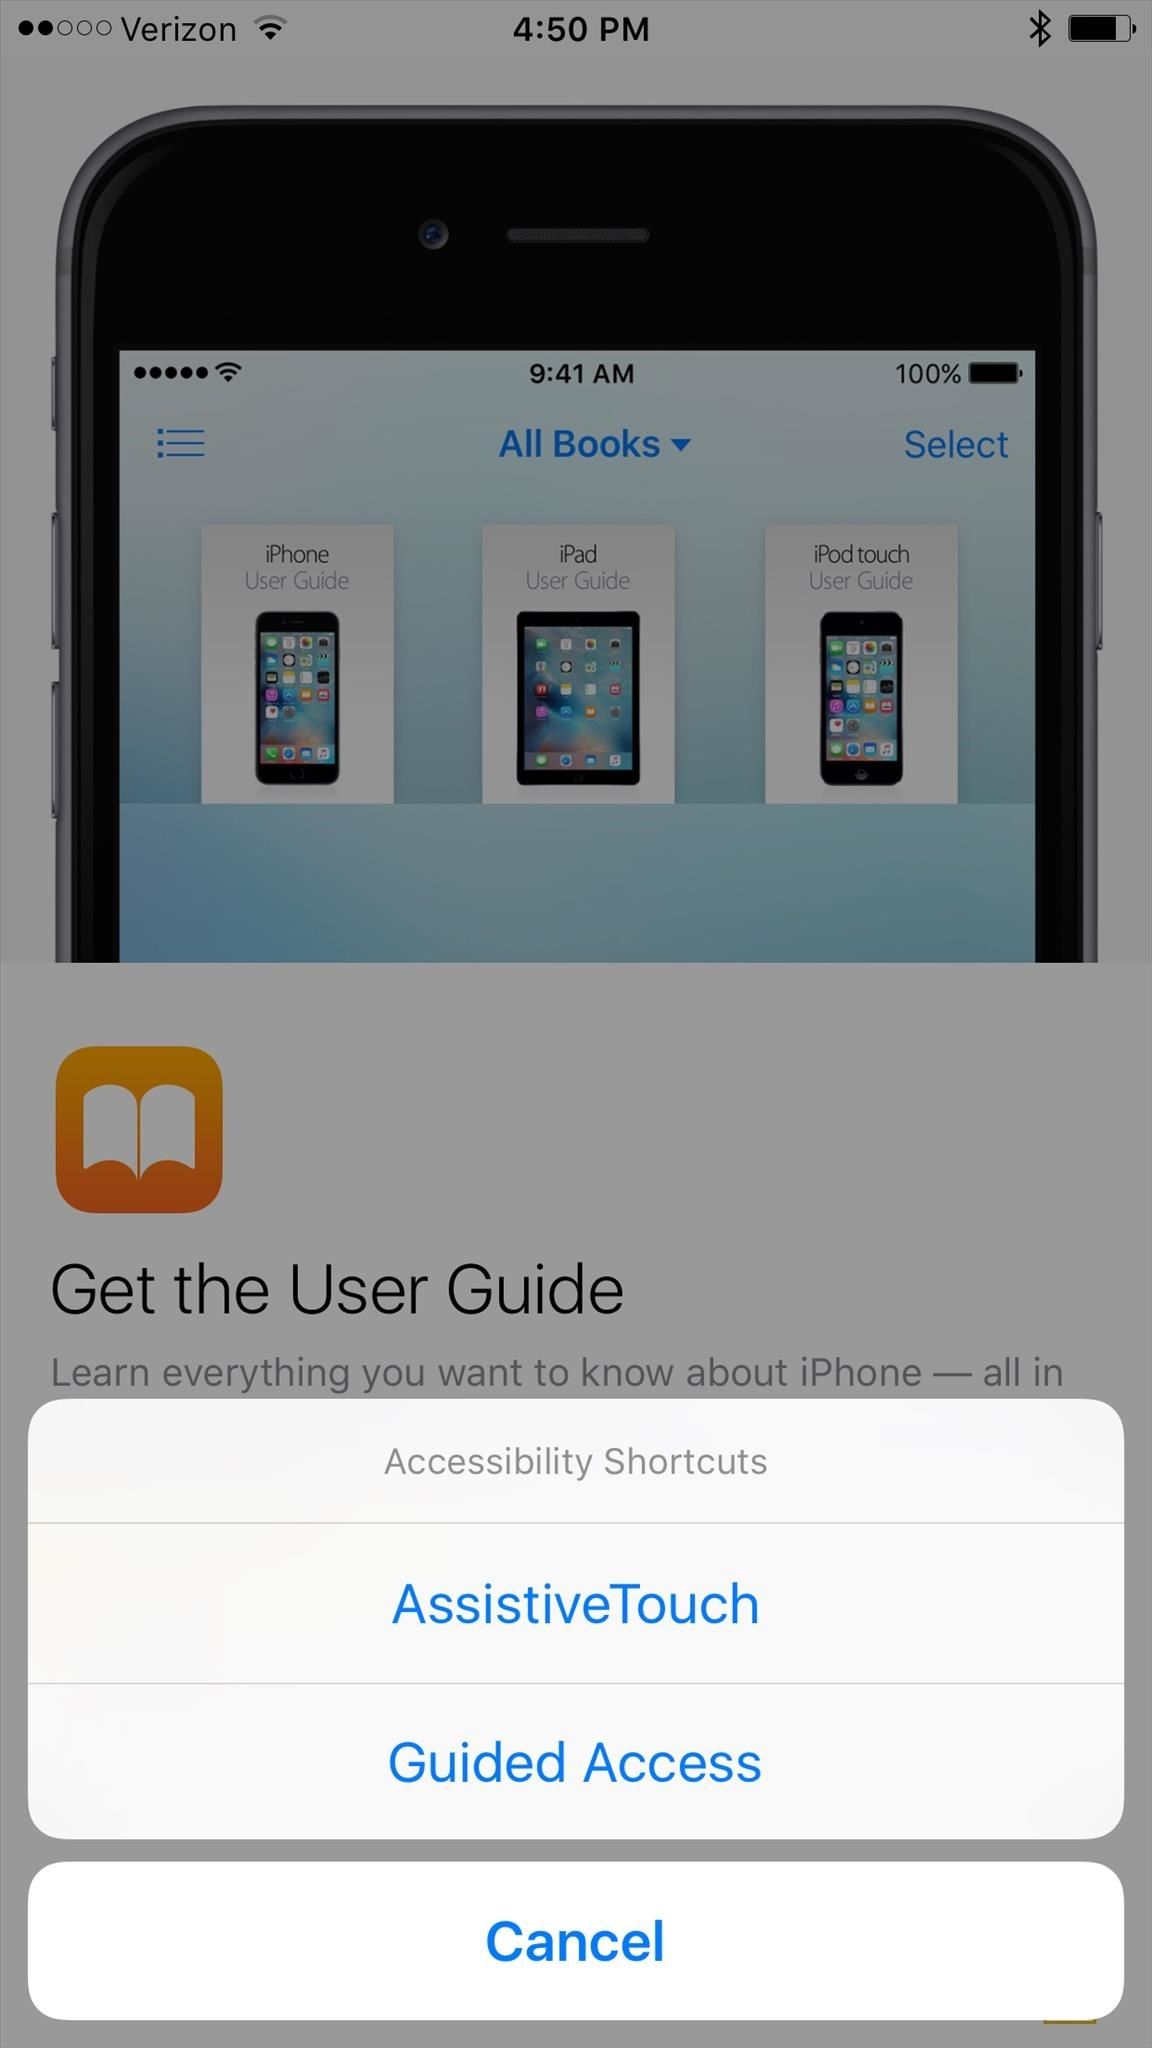
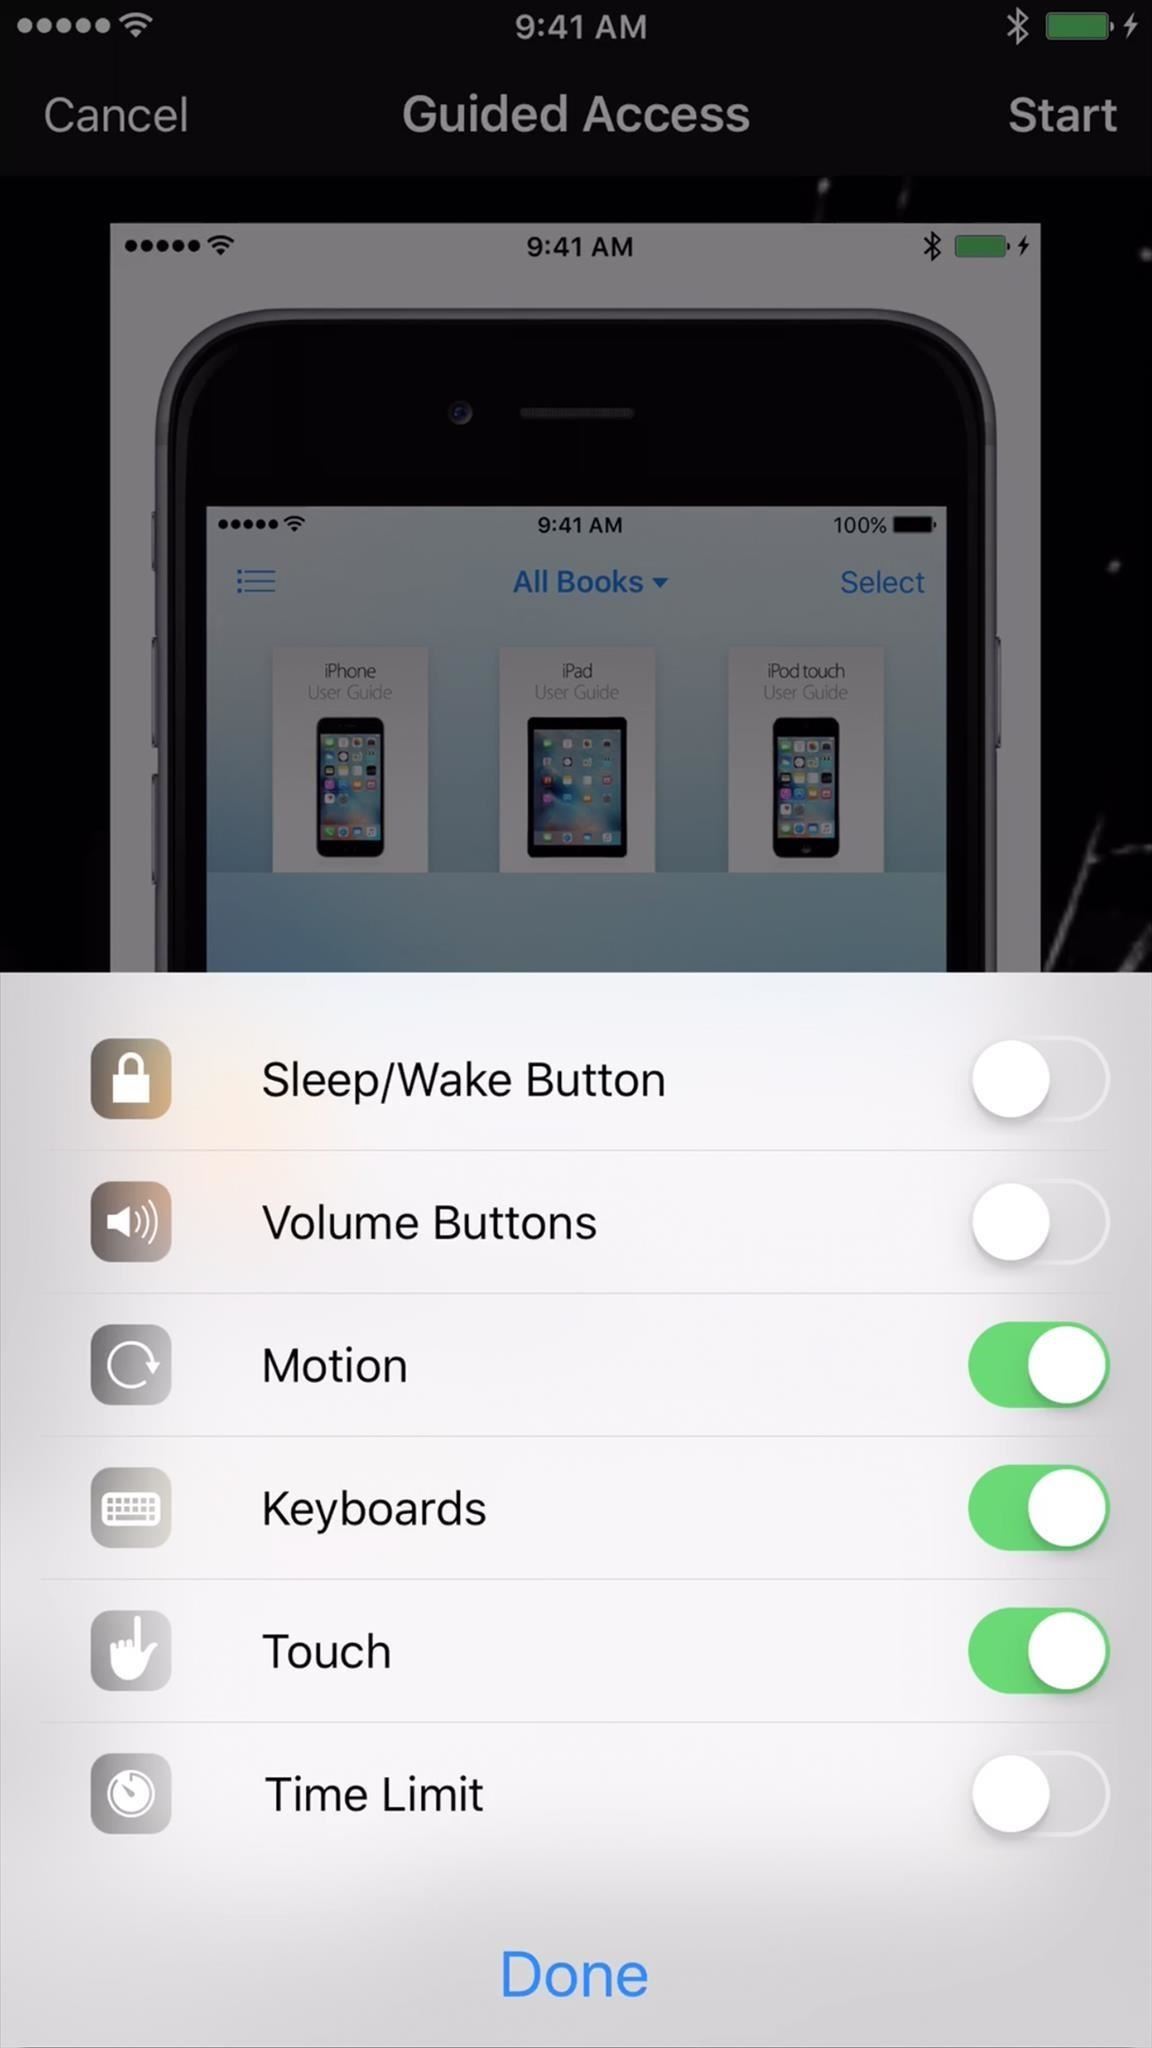
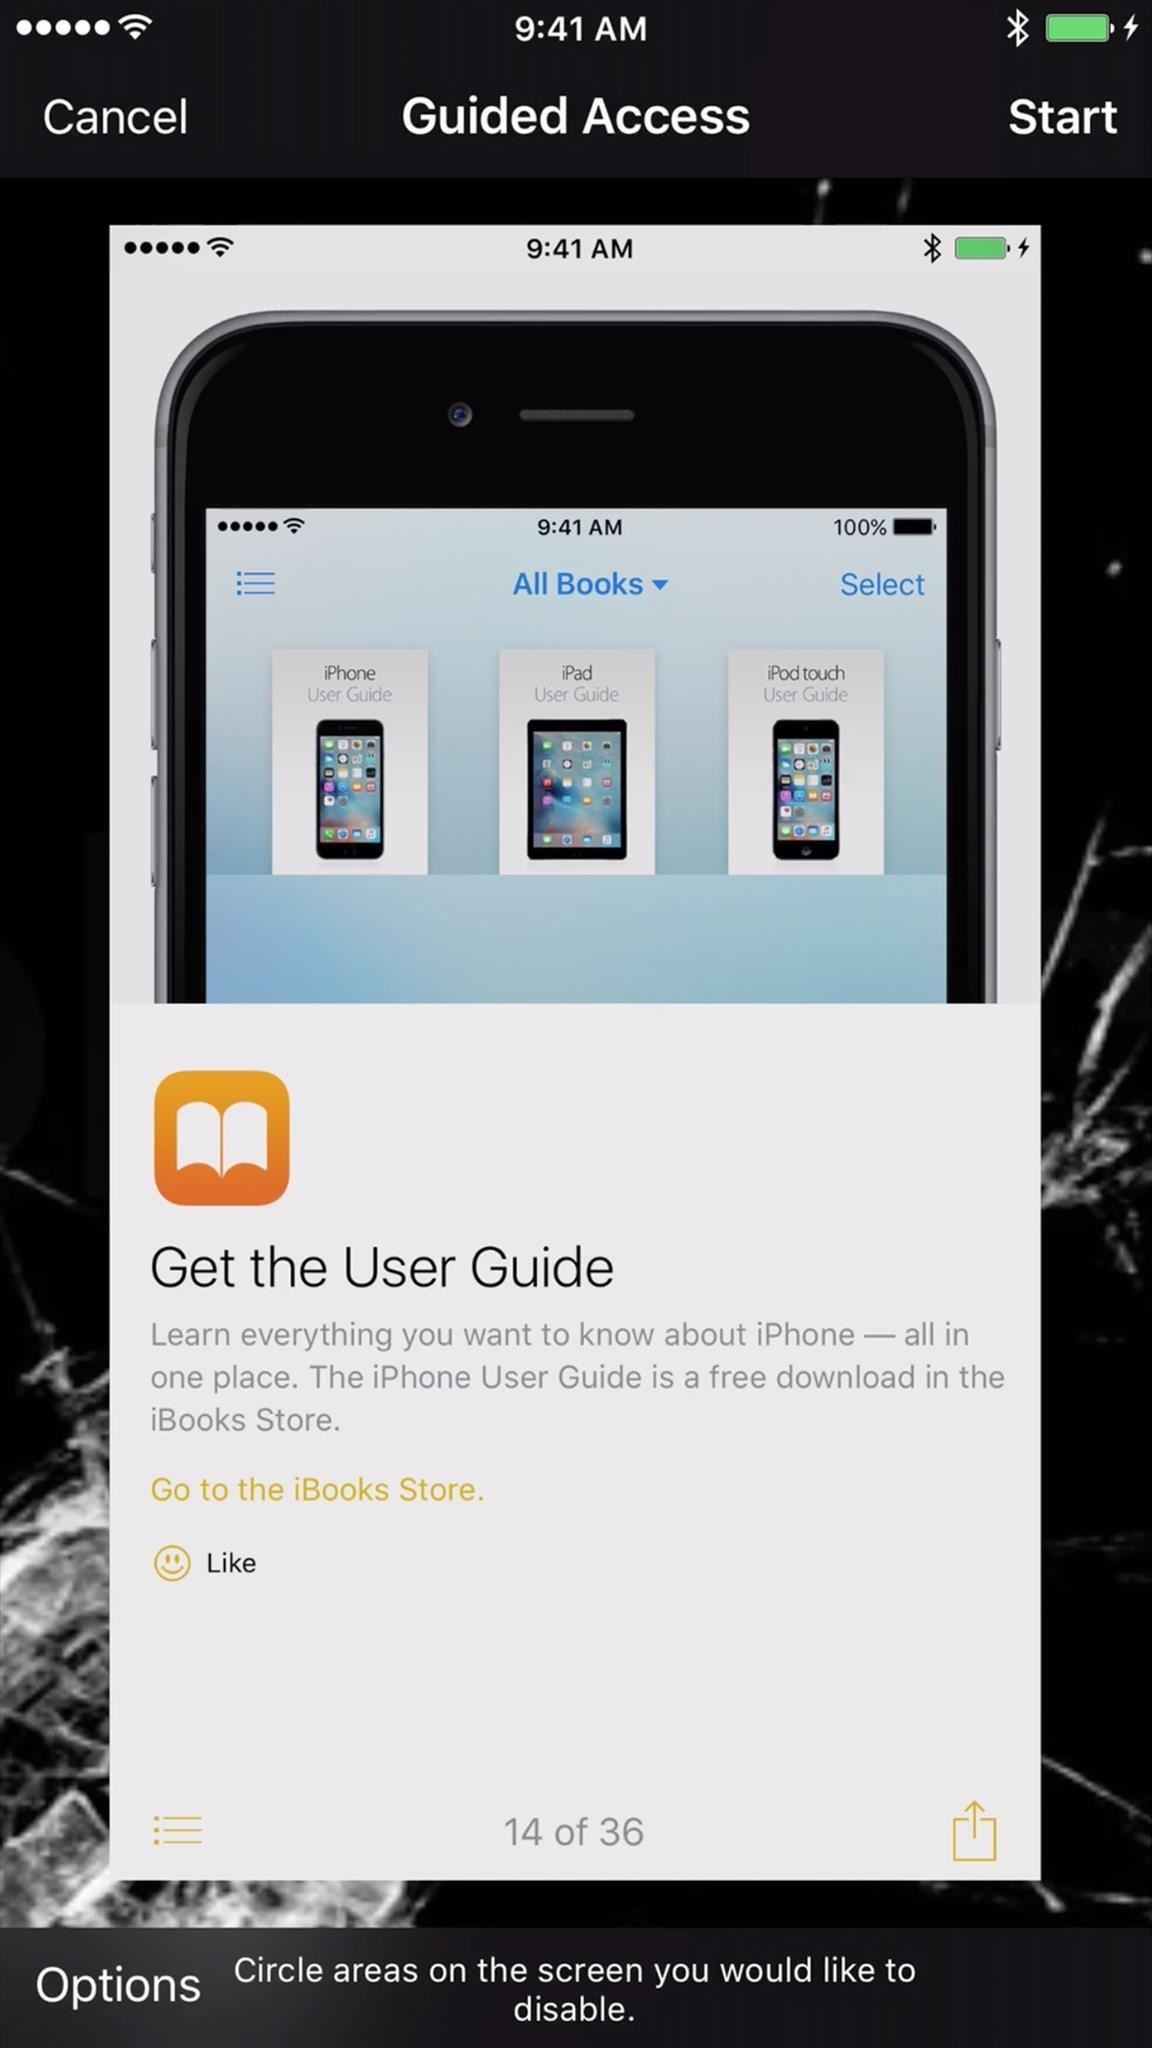
Now open a different app, preferably something tame like the Tips app, then triple-click the Home button. (If they have AssistiveTouch or another shortcut enable already for triple-click, just choose "Guide Access" at the popup.) Then, configure your options here if you want even more damage, and hit Start.
After you've had enough fun watching them freak out about their "busted" iOS device, you can jump in and save the day. To exit Guided Access, triple-click the Home button and type in the passcode (if one was added), then go back to Settings and turn it off.
3. 'Nothing Works... WTF Is Happening to My Mac?'
This one is super easy, takes very little time, and is pretty effective until your victim catches on.
If their Mac is awake and unlocked, don't touch anything just yet. If they have apps open, keep them open. If they're just on their empty desktop, keep it there. Then, take a screenshot of their full screen using the keyboard shortcut Command + Shift + 3. Unless they changed the stored location, the screenshot should appear on their desktop.
Open this image inside the Preview app and enter into full screen mode via the green traffic light button in the top left, or use Command + Shift + F. Boom—you've just created a frozen screen for the gullible.
More experienced users will notice a couple "glitches" with this and realize what's going on, but most people will just keep on clicking around until they accidentally reveal the menu bar up top and see that the Preview app is open.
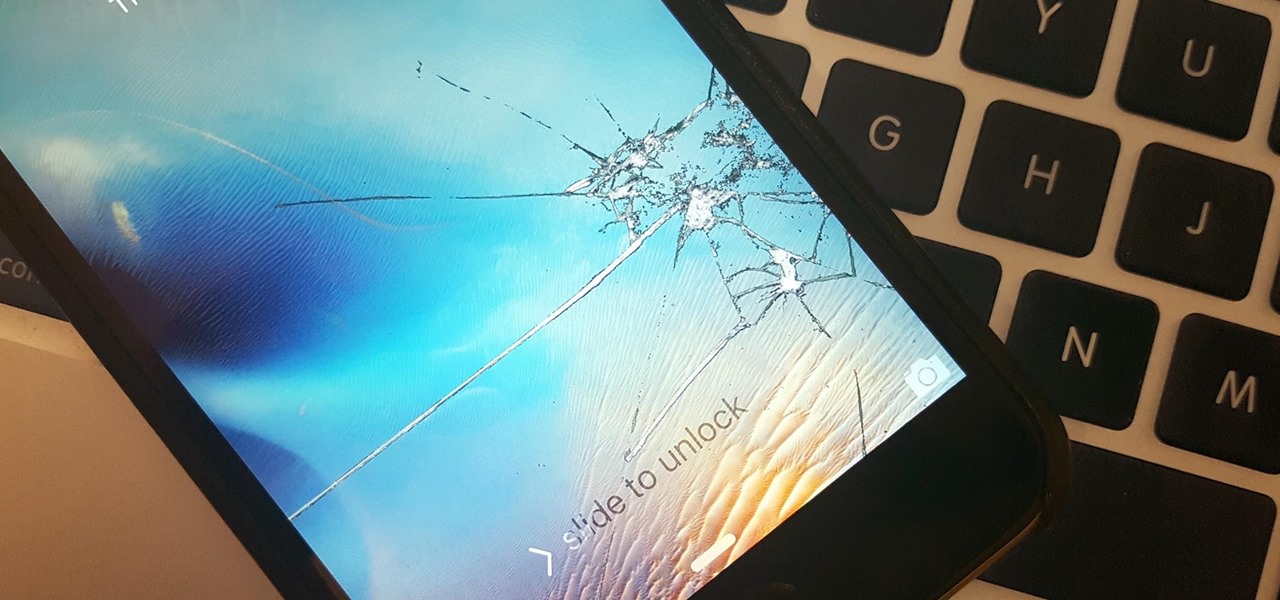
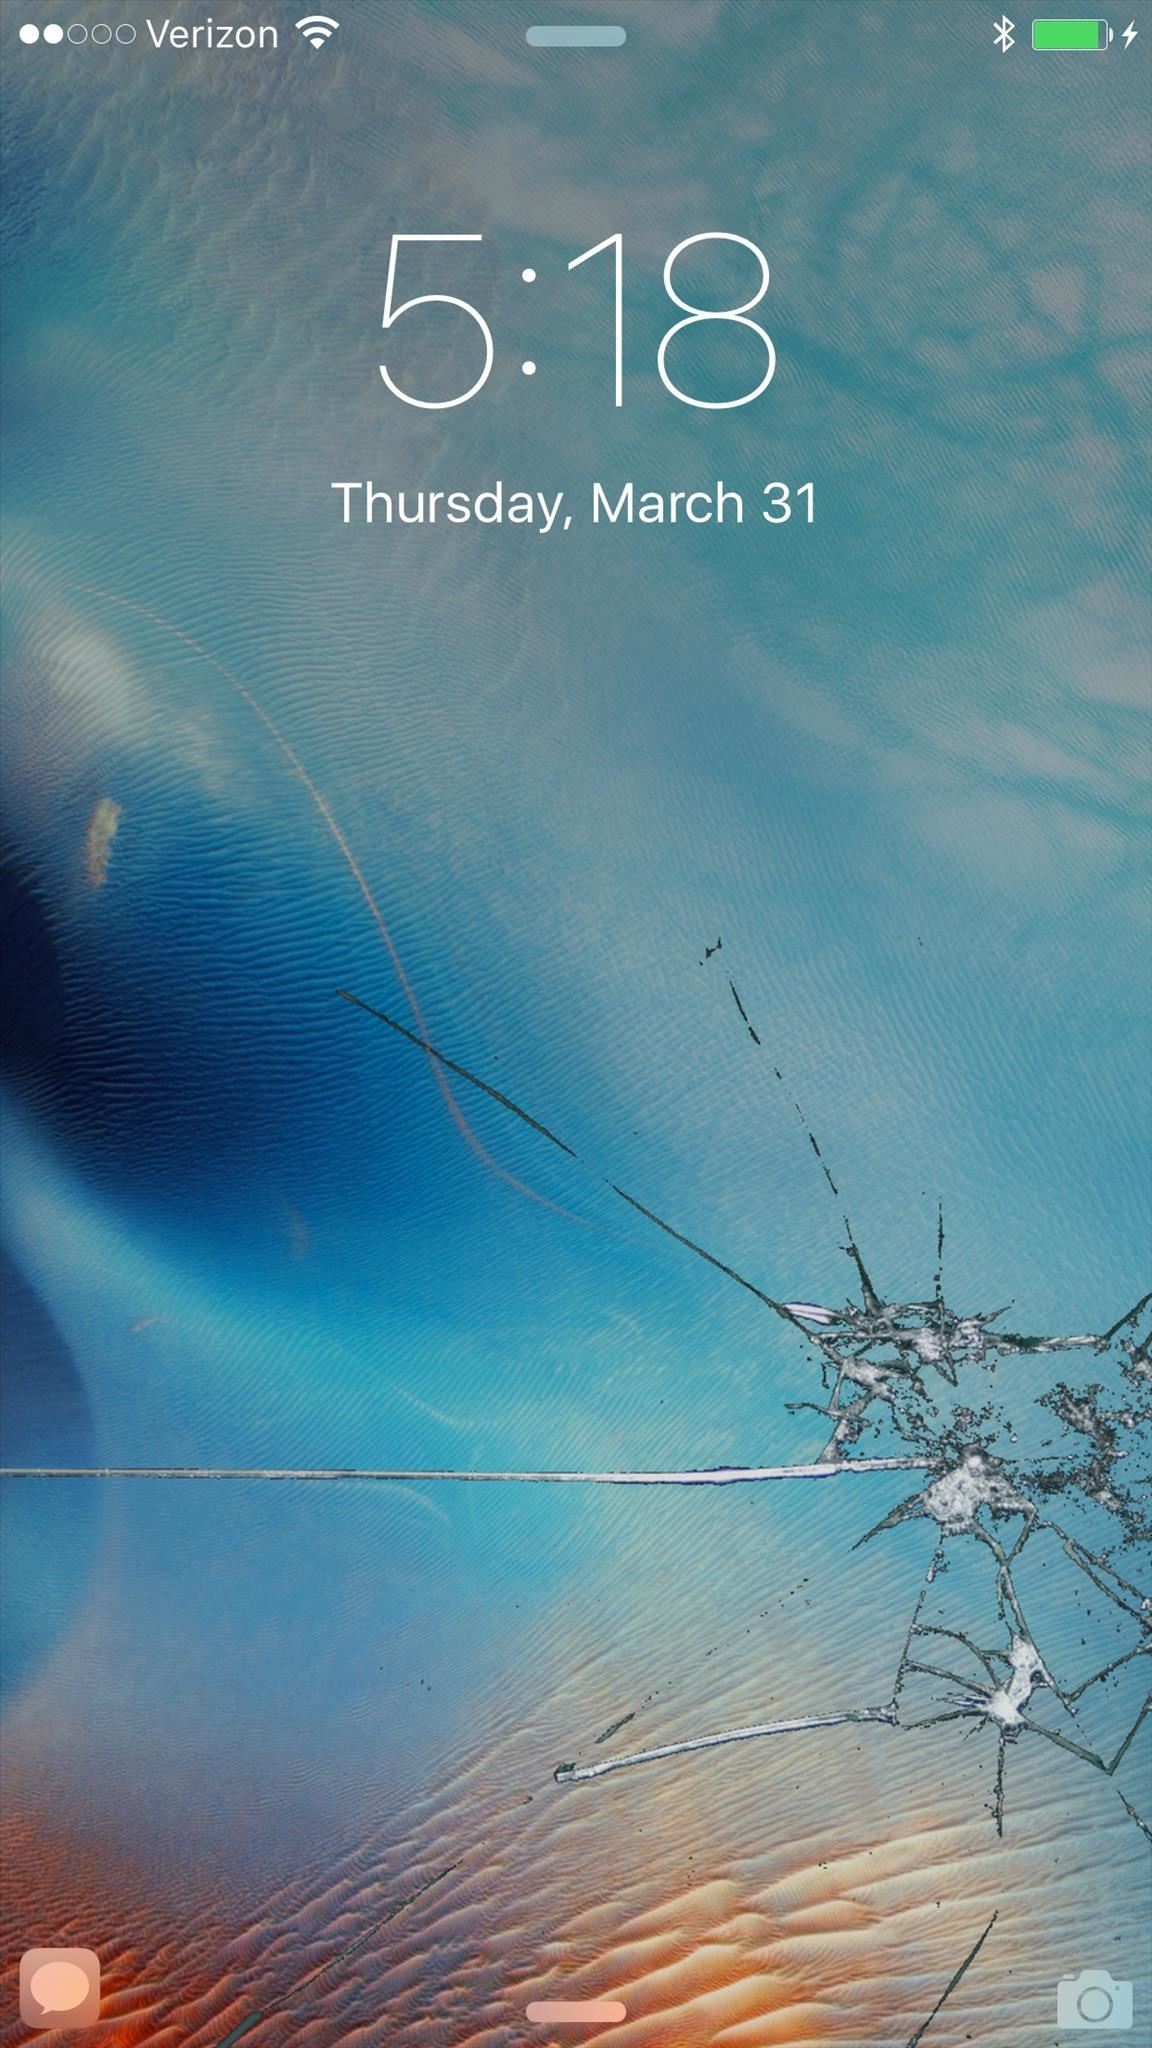
4. The Classic, 'Oh No, My Screen Is Cracked!'
This one works for both iOS and Mac, but much better on the former. I'll be covering it for an iPhone.
On their device, search Google for "cracked glass" images, save one you like, then set it as the wallpaper for the lock screen and home screen (or just one or the other).
If you have plenty of time, you can take a screenshot of whatever screen their device was left on when you got it, then use a photo-editing app to overlay the cracked glass over the screenshot for a more realistic effect.
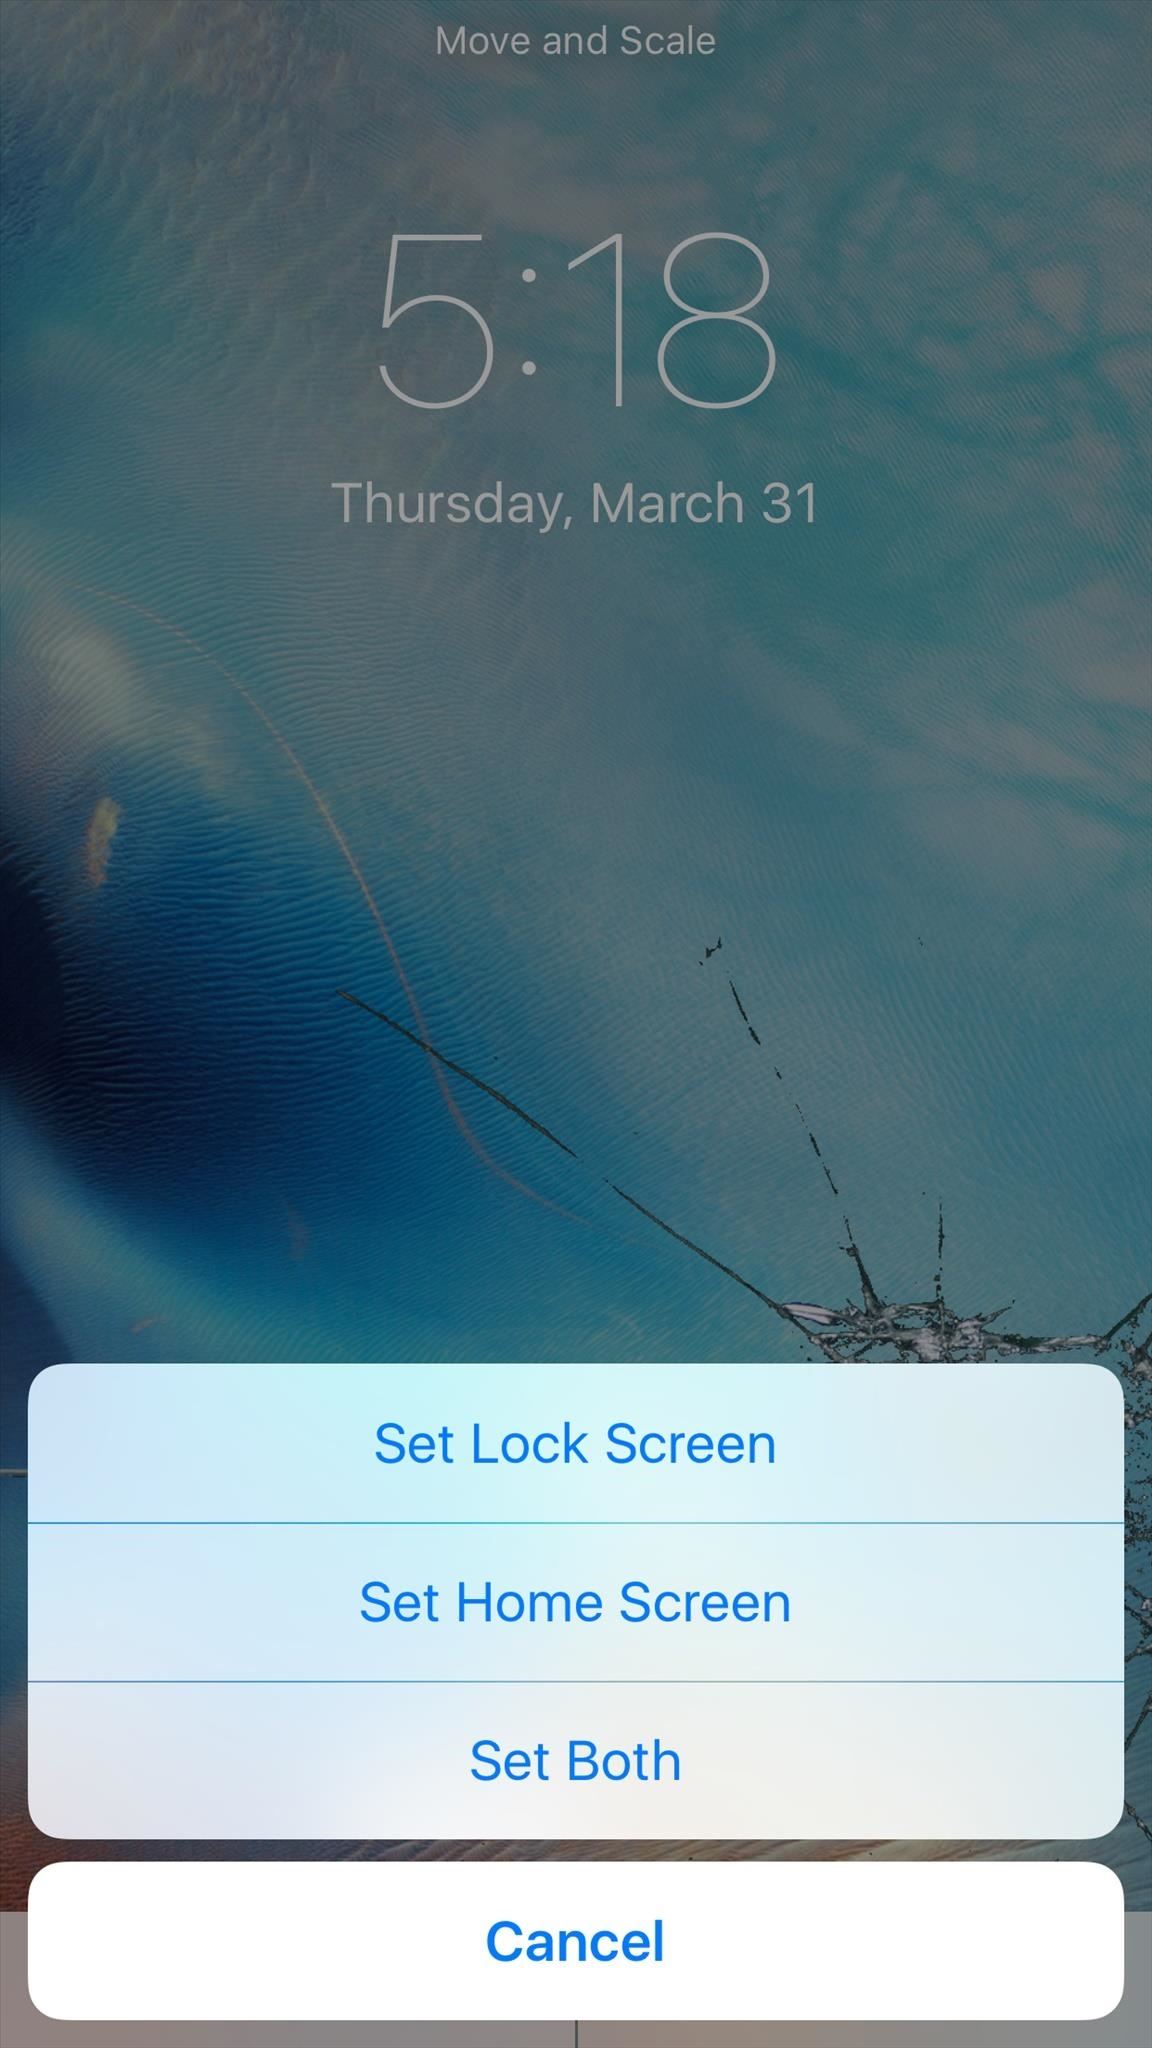
To make things even easier on you, just use this image (see below), which already has the cracked effect on a stock iOS 9 wallpaper for iPhones. To set the wallpaper, go to Settings -> Wallpaper -> Choose a New Wallpaper -> Camera Roll, then choose the cracked glass image. (You can also use the share sheet in the Photos app to make it a wallpaper.)

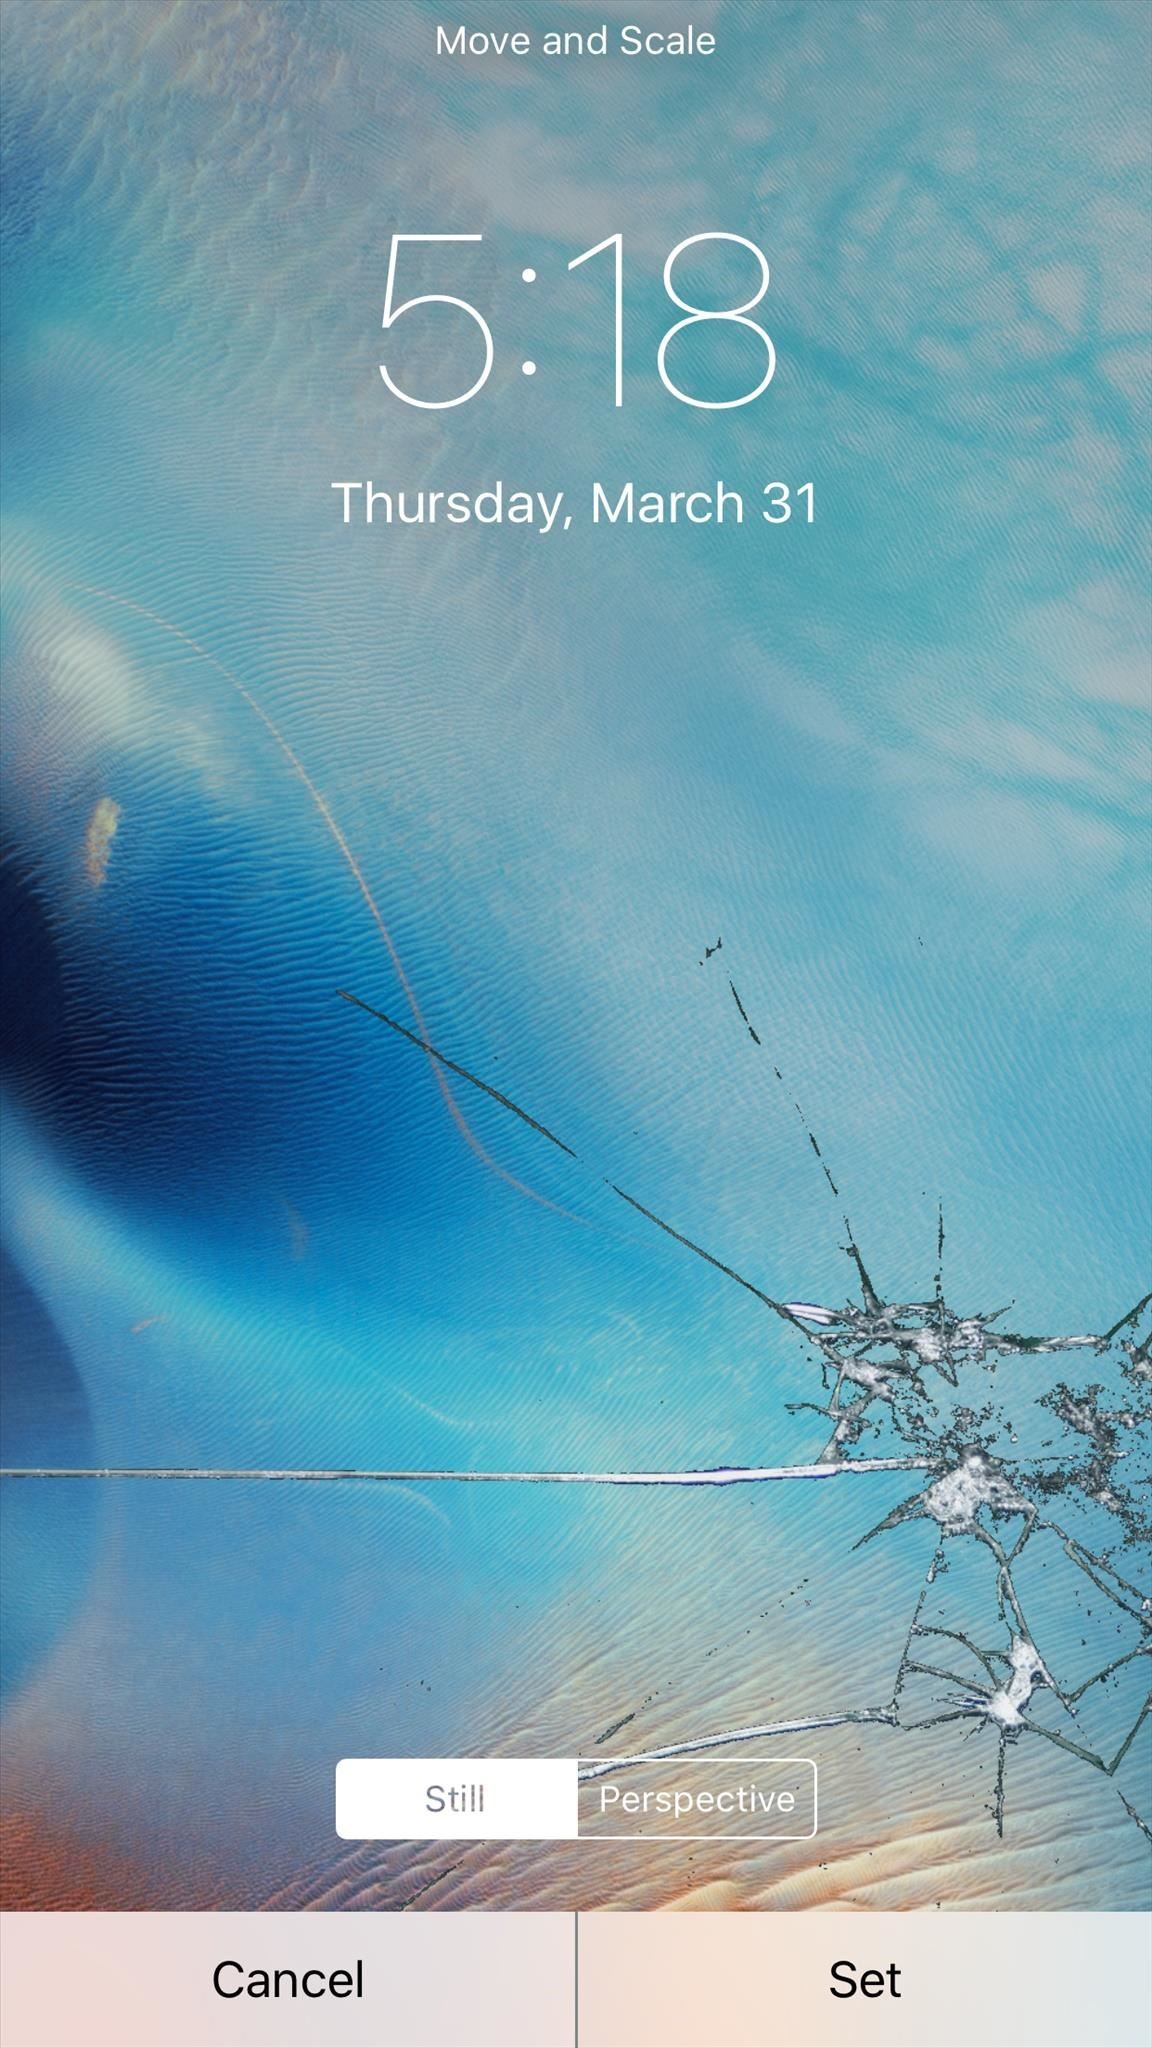
To make sure it doesn't move and ruin the fun, select Still, then hit Set and make your choice. This one looks best on the lock screen, since there are no app icons on top of the effect.
You can also screenshot certain features of iOS, like alert views and action sheets, and cleverly manipulate icons to make it seem as if the device is not responding. But if you're low on time, the cracked glass is the way to go.
Just updated your iPhone? You'll find new emoji, enhanced security, podcast transcripts, Apple Cash virtual numbers, and other useful features. There are even new additions hidden within Safari. Find out what's new and changed on your iPhone with the iOS 17.4 update.


Be the First to Comment
Share Your Thoughts